Payment Gateway integration with node JS.

A payment gateway is an online service that allows businesses and individuals to accept payments from customers through their websites or mobile applications.
It acts as a secure bridge between the customer’s payment method (such as a credit card or digital wallet) and the merchant’s bank account, facilitating the authorization and processing of transactions. It serves as an interface between the merchant, payment processor, the acquiring bank, and informs the customer of their buying status. All in all, a payment gateway oversees card payments, transaction encryption, and verification systems. Also it ensures security by encrypting data like card and bank details provided by the user.
You should consider integrating with a payment gateway if you have a website or a mobile app.
The below process describes the steps involved in Payment processing via the Payment gateway:
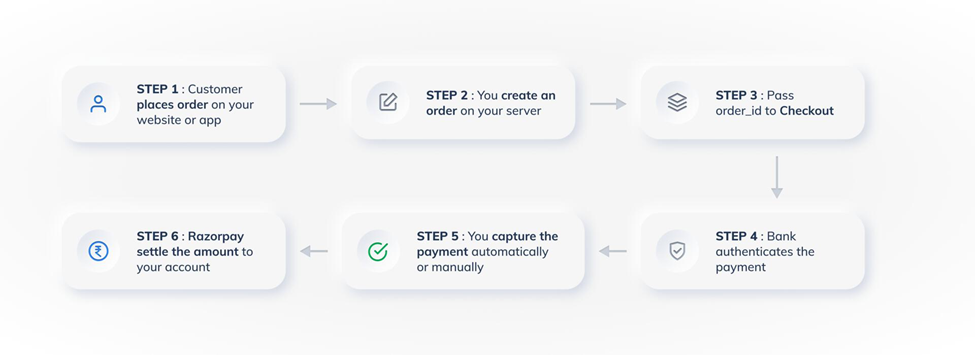
Customers place an order on your website or app
You create an order from your server
Pass Order ID to checkout and collect payment details
Bank authenticates the payment
Capture the payment
The payment gateway settles the amount
Razorpay Payment Gateway integration with MERN
Before integrating razorpay with React frontend and Node backed – we need to fulfill below pre-requisites.
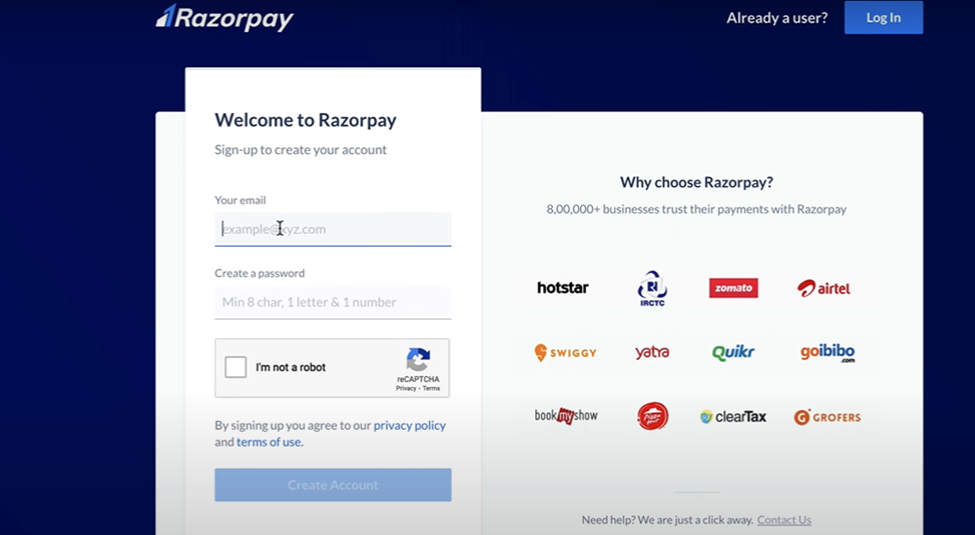
1) Visit razorpay.com and create account.
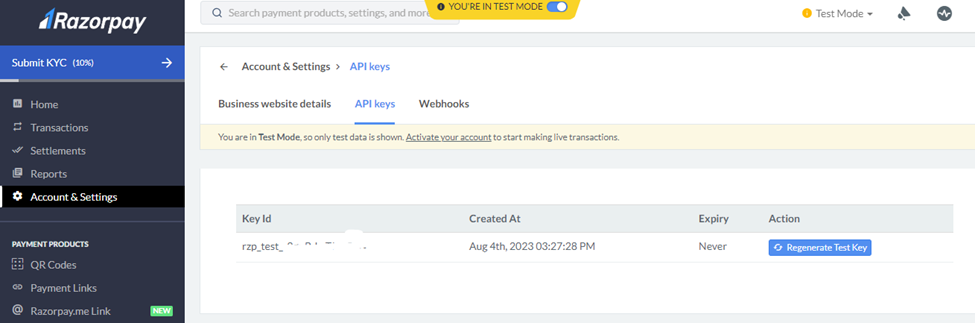
2) Generate and download the API keys on the razorpay dashboard.
After successful login to the razorpay.com – Generate the API keys.
API keys include –
1) RAZORPAY_API_KEY
2) RAZORPAY_API_SECRET
Integration steps:
Here we will be creating react front end and Backend with node JS.
For Backend application- Instantiate the backend node JS server with – npm init –y. And install the other basic packages:

The above installation will create a Package.json file in the root directory with the installation of the above dependencies. (Above installation command need to run in the root directory of the backend app)
1) Install the Razorpay Node JS SDK with

2) Create a Razorpay instance.
Initiate the node server with the express framework. Create a server.js file in the root folder.
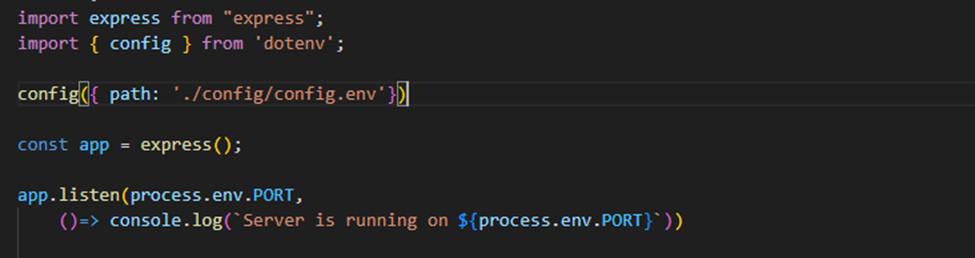
Here we are using dotenv library which will fetch environment variables.
Initiate Razorpay instance with Razorpay key id and secret id collected from Razorpay application.

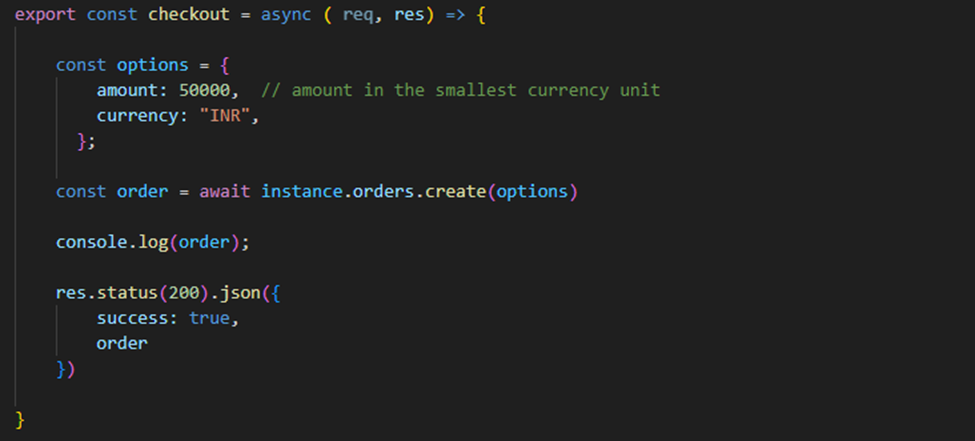
3)Order creation:
Order is an important step in the payment process. An order should be created for every payment.
In the below case- we have created a checkout function that will create an order and provide order details in the response.
Note: Once the user clicks on the buy product/now button – from the front end Order creation and Payment verification processes started one after another respectively.
We can route the checkout function with below router definition:
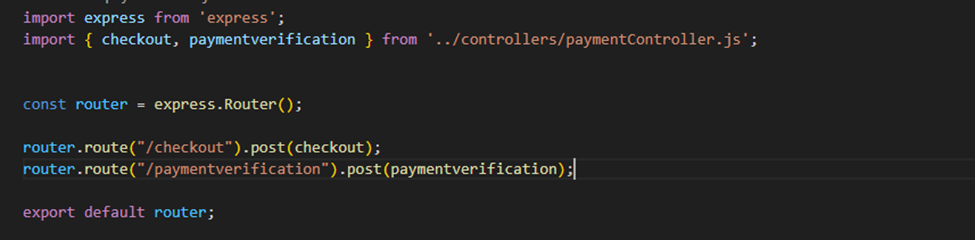
Call the Checkout api from frontend with amount in payload body. And order will be created and order id will be received by frontend in api response.

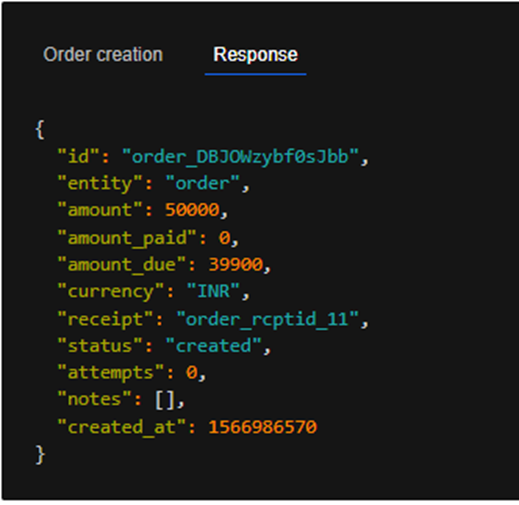
The order api response will come as below:
4) Checkout the order:
Order checkout is performed just after the order creation and order id is passed in checkout options.

Once the checkout process is started – it will load the checkout script and we have to enter payment details- like card etc details.
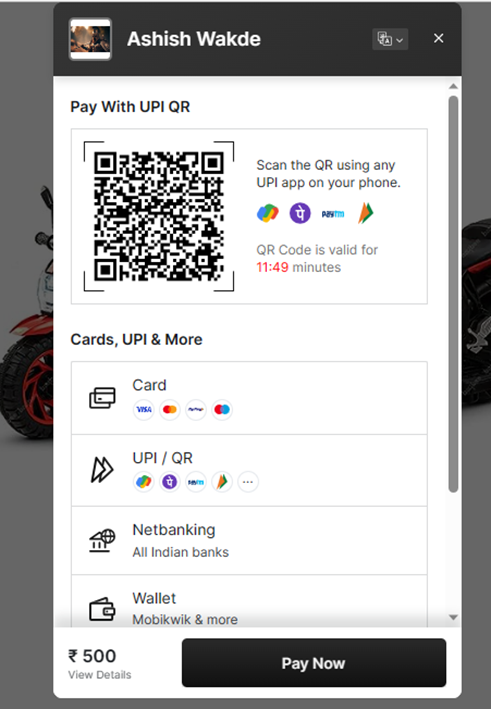
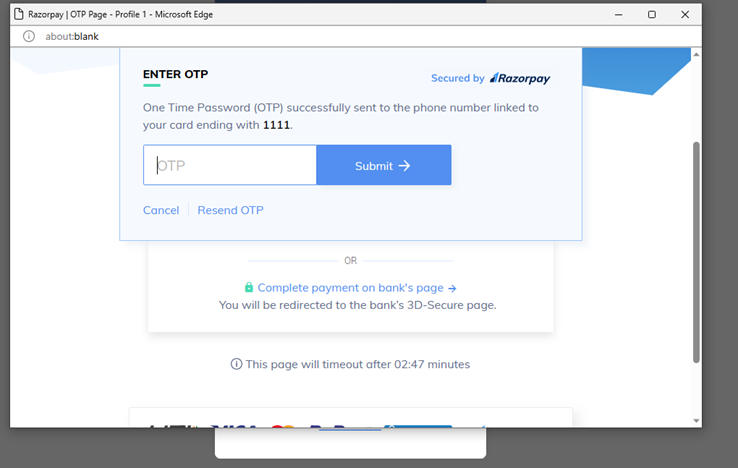

Checkout can be performed in two ways (functions):
1) Handler function
2)Callback URL.
Handler function:
On successful payment, the customer is shown your web page.
On failure, the customer is notified of the failure and asked to retry the payment.
Callback URL
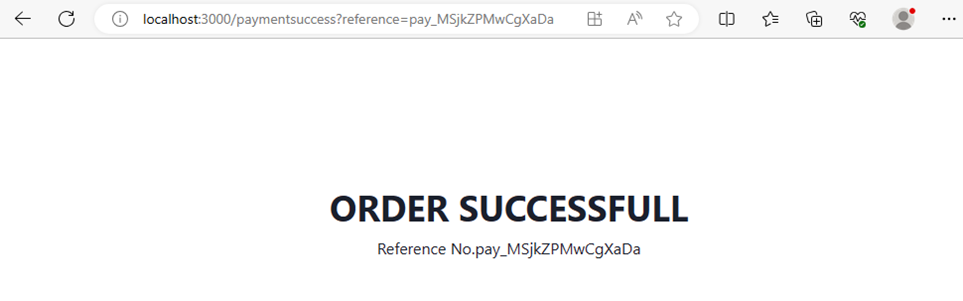
On successful payment, the customer is redirected to the specified URL, for example, a payment success page.
On failure, the customer is asked to retry the payment.
Here we will be using Callback URL:
Checkout process will be called just after order id received to our frontend application.
a) To start the checkout – we need to insert below script in frontend application. For example, in react application- need to insert this in index.html file in public folder.
<script src="https://checkout.razorpay.com/v1/checkout.js"></script>
b) Once above checkout script is added in application. We can initiate razorpay instance in below way:

To initiate razorpay instance here we need to pass the options details as below:
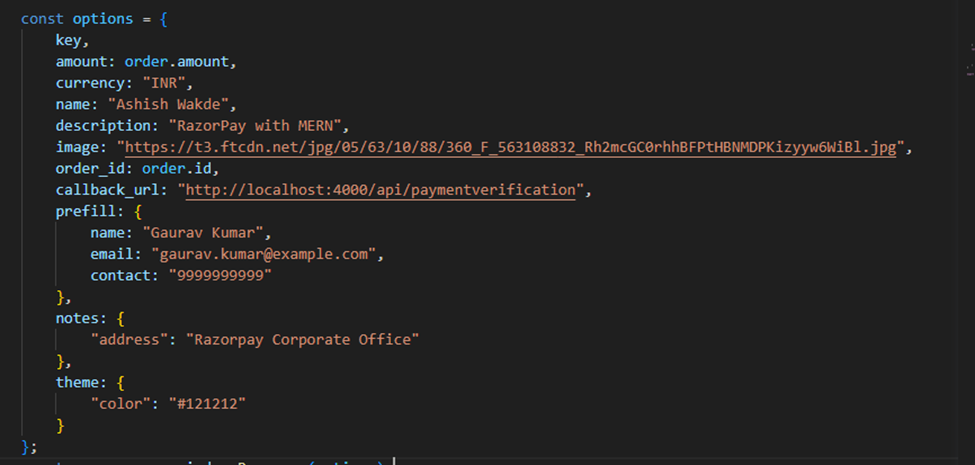
Here:
key: indicates the Razorpay Key id – which was collected from razorpay account creation process.
amount: is the amount value received in order response.
image: Indicates here as the portfolio image of your business or any website where we are applying the payment gateway.
Order_id: this is the order id received in order response.
callback_url: This is the URL where application will be redirected once checkout is successful. We can redirect on page where- successful payment message can be shown or can be called a payment verification API call to verify the Payment.
Here in above case we are calling an API- which will be doing payment verification.
5) Payment verification
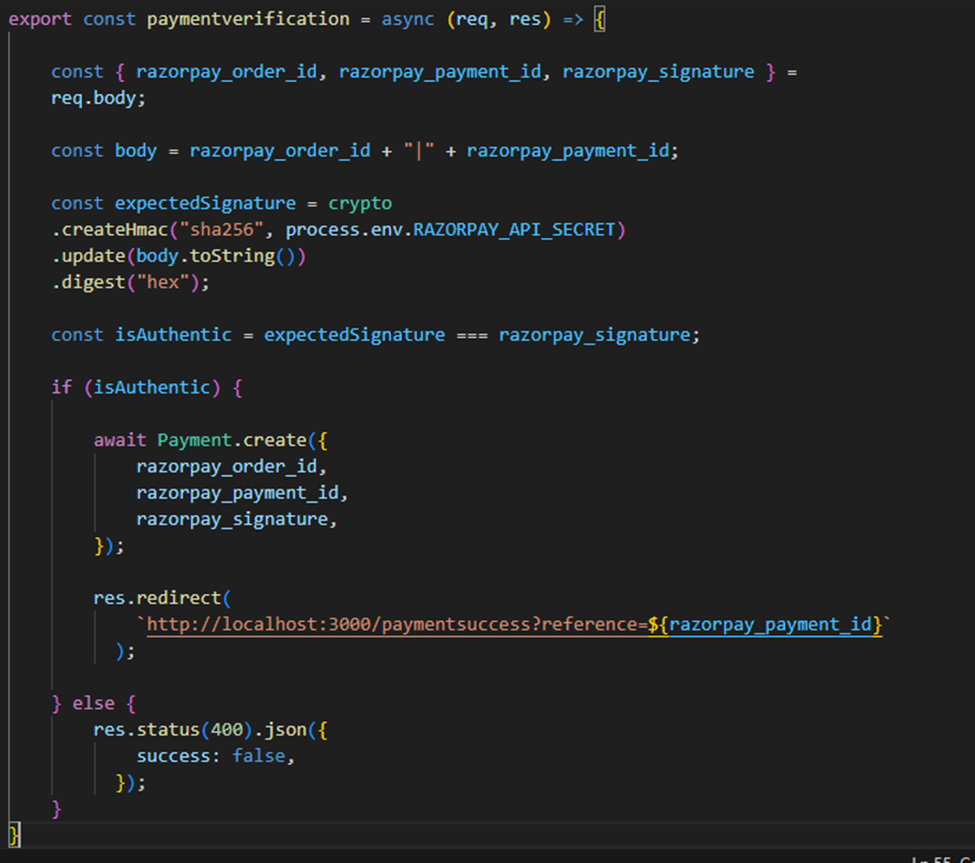
This is a mandatory step that allows you to confirm the authenticity of the details returned to the checkout for successful payments. To verify the razorpay_signature returned to you by the checkout:
Here- we have created API – Payment verification – which will take razorpay_order_id, razorpay_payment_id, razorpay_signature. This values will be received in Payload body of the API call.
Create expected signature as below and compare it with received signature value. If expected signature is similar to received signature value. Payment verification will be considered as successful.

Here with successful Payment verification application can be redirected on the Page where user can see verification successful message.

6) Store Payment values in server:
Here we can store Payment ids in any type of database as per our convenient. I have used mongoDB.
Make mongo DB connection with node JS application and store value in database.
Storing Payment ids can be performed in Payment verification stage as we confirm the signature value received is correct one.
Here we need to create one mongoDB model and store value.
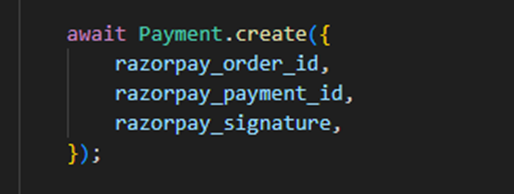
Here we have imported model as Payment. And stored the values as create function.
7) Verify Payment status:
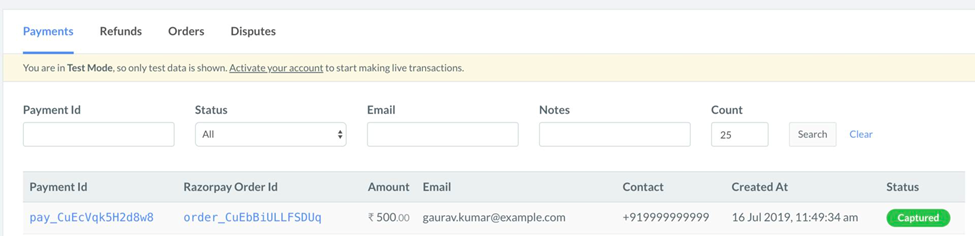
To verify the payment status on the Dashboard:
Log in to the Dashboard and navigate to Transactions → Payments.
Check if a Payment Id has been generated and note the status. In case of a successful payment, the status is marked as Captured.
Source code available at: https://github.com/Ashishwakde26/RazorPay-React-Node


